Android - Firebase Realtime Database with CRUD Operation
4 minutes read
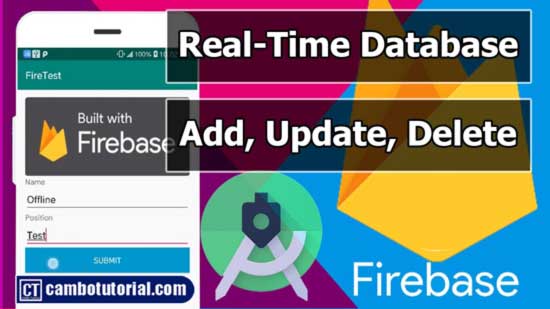
In this article, we will learn how to perform CRUD (Create, Read, Update, Delete) operations in android application based on Firebase Realtime Database. In this app, users can add an employee with their name and position to the database, fetch, update, and delete them.
I assume you know how to set up Firebase into Android project, so now, we will start implementing the layout and class.
Step 1: We design layout activity_main.xml with 2 edit texts and 2 buttons for submitting data and launch new activity for display data.

activity_main.xml
<?xml version="1.0" encoding="utf-8"?>
<LinearLayout xmlns:android="http://schemas.android.com/apk/res/android"
    xmlns:tools="http://schemas.android.com/tools"
    android:layout_width="match_parent"
    android:layout_height="match_parent"
    tools:context=".MainActivity"
    android:padding="15dp"
    android:orientation="vertical">
    <ImageView
        android:layout_width="match_parent"
        android:layout_height="wrap_content"
        android:scaleType="fitXY"
        android:src="@drawable/download"/>
    <TextView
        android:layout_width="wrap_content"
        android:layout_height="wrap_content"
        android:text="Name"/>
    <EditText
        android:layout_width="match_parent"
        android:layout_height="wrap_content"
        android:id="@+id/edit_name"/>
    <TextView
        android:layout_width="wrap_content"
        android:layout_height="wrap_content"
        android:text="Position"/>
    <EditText
        android:layout_width="match_parent"
        android:layout_height="wrap_content"
        android:id="@+id/edit_position"/>
    <Button
        android:layout_width="match_parent"
        android:layout_height="wrap_content"
        android:id="@+id/btn_submit"
        android:background="@android:color/holo_blue_dark"
        android:text="Submit"
        android:textColor="@android:color/white"/>
    <Button
        android:layout_width="match_parent"
        android:layout_height="wrap_content"
        android:id="@+id/btn_open"
        android:text="Open" />
</LinearLayout>
Step 2: Add dependency library firebase in gradle file build.gradle file (Module: app).
app -> build.gradle(Module: app)
implementation 'com.google.firebase:firebase-database:20.0.5'
After that you can click sync link on top right cornor to download dependency.
Step 3: Design model class for store data(tree node name in Firebase will have the same name) and display back
Employee.java
package com.hellokh.sovary.firetest;
import com.google.firebase.database.Exclude;
import java.io.Serializable;
public class Employee implements Serializable
{
    @Exclude
    private String key;
    private String name;
    private String position;
    public Employee(){}
    public Employee(String name, String position)
    {
        this.name = name;
        this.position = position;
    }
    public String getName()
    {
        return name;
    }
    public void setName(String name)
    {
        this.name = name;
    }
    public String getPosition()
    {
        return position;
    }
    public void setPosition(String position)
    {
        this.position = position;
    }
    public String getKey()
    {
        return key;
    }
    public void setKey(String key)
    {
        this.key = key;
    }
}
Step 4: Create DAO class for working on business logic and access Firebase
DAOEmployee.java
package com.hellokh.sovary.firetest;
import com.google.android.gms.tasks.Task;
import com.google.firebase.database.DatabaseReference;
import com.google.firebase.database.FirebaseDatabase;
import com.google.firebase.database.Query;
import java.util.HashMap;
public class DAOEmployee
{
    private DatabaseReference databaseReference;
    public DAOEmployee()
    {
        FirebaseDatabase db =FirebaseDatabase.getInstance();
        databaseReference = db.getReference(Employee.class.getSimpleName());
    }
     public Task<Void> add(Employee emp)
    {
        return databaseReference.push().setValue(emp);
    }
    public Task<Void> update(String key, HashMap<String ,Object> hashMap)
    {
        return databaseReference.child(key).updateChildren(hashMap);
    }
    public Task<Void> remove(String key)
    {
        return databaseReference.child(key).removeValue();
    }
    public Query get()
    {
        return databaseReference;
    }
}
We instance all database references in constructor once we instance the object DAO we can use the database reference at the same time. For those CRUD methods that have return value as Task<Void> we may easily implement in the future.
Step 5: Implement in MainActivity.java
package com.hellokh.sovary.firetest;

import androidx.appcompat.app.AppCompatActivity;
import android.content.Intent;
import android.os.Bundle;
import android.view.View;
import android.widget.Button;
import android.widget.EditText;
import android.widget.Toast;
import java.util.HashMap;
public class MainActivity extends AppCompatActivity
{
    @Override
    protected void onCreate(Bundle savedInstanceState)
    {
        super.onCreate(savedInstanceState);
        setContentView(R.layout.activity_main);
        final EditText edit_name = findViewById(R.id.edit_name);
        final EditText edit_position = findViewById(R.id.edit_position);
        Button btn_submit = findViewById(R.id.btn_submit);
        Button btn_open =findViewById(R.id.btn_open);
        btn_open.setOnClickListener(click ->
        {
            Intent intent = new Intent(MainActivity.this,RVActivity.class);
            startActivity(intent);
        });
        ///We pass data from other activity to edit
        Employee emp_edit = (Employee)getIntent().getSerializableExtra("EDIT");
        if(emp_edit !=null)
        {
            btn.setText("UPDATE");
            edit_name.setText(emp_edit.getName());
            edit_position.setText(emp_edit.getPosition());
            btn_open.setVisibility(View.GONE);
        }
        else
        {
            btn.setText("SUBMIT");
            btn_open.setVisibility(View.VISIBLE);
        }
        DAOEmployee dao =new DAOEmployee();
        btn_submit.setOnClickListener(v->
        {
            if(emp_edit==null)
            {
                Employee emp = new Employee(edit_name.getText().toString(), edit_position.getText().toString());
                //because add() method is return as Task so we can implement like if success we can perform other action and so on
                dao.add(emp).addOnSuccessListener(suc ->
                {
                    Toast.makeText(this, "Record is inserted", Toast.LENGTH_SHORT).show();
                }).addOnFailureListener(er ->
                {
                    Toast.makeText(this, "" + er.getMessage(), Toast.LENGTH_SHORT).show();
                });
            }
            else
            {
                HashMap<String, Object> hashMap = new HashMap<>();
                hashMap.put("name", edit_name.getText().toString());
                hashMap.put("position", edit_position.getText().toString());
                //update is required key, this is manually input to update
                dao.update("-MXgqaKEPSYq9q8SQaVW", hashMap).addOnSuccessListener(suc ->
                {
                    Toast.makeText(this, "Record is updated", Toast.LENGTH_SHORT).show();
                    finish();
                }).addOnFailureListener(er ->
                {
                    Toast.makeText(this, "" + er.getMessage(), Toast.LENGTH_SHORT).show();
                });
            }
        });
    }
}
The video below is implemented Realtime Firebase from scratch
Download Project
You might Also Like:
- Android - In-App Updates API Flexible and Immediate
- Implement Awesome Chart Graph in Your Android App
- Android Build a Biometric Fingerprint or PIN
- Android - How to Generate QR Code in Android
- Laravel 9 Add Google reCaptcha v2 Example
Android Java Video Firebase

Author
As the founder and passionate educator behind this platform, I’m dedicated to sharing practical knowledge in programming to help you grow. Whether you’re a beginner exploring Machine Learning, PHP, Laravel, Python, Java, or Android Development, you’ll find tutorials here that are simple, accessible, and easy to understand. My mission is to make learning enjoyable and effective for everyone. Dive in, start learning, and don’t forget to follow along for more tips and insights!. Follow him
Search
Tags
Popular Articles
-
10 minutes Build Bar Code and QR Code Scanner in Android App
17.8K -
Android - In-App Updates API Flexible and Immediate Show Update Available Dialog Inside App
11.09K -
Android Show a Biometric Fingerprint Authentication Dialog Example
9.15K -
How to Implement Awesome Chart Graph in Your Android App
8.49K -
Android - Firebase Realtime Database with CRUD Operation
6.61K -
Android - How to Generate QR Code in Android Studio free Source Code
5.81K