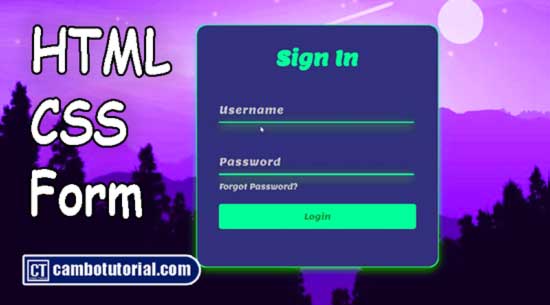
Login Form Design with HTML CSS Only
3 minutes read
In web application UI is presentation to user and make user more comfortable. The login or register form we can make from imagination to show how creative designed and show to end user. If you are new to web application let's me explain some concept first, and you will find below HTML code and CSS to design a login form from scratch.
HTML (HyperText Markup Language) and CSS (Cascading Style Sheets) are fundamental technologies used in web development, and they serve specific purposes in creating a login form for a web application.
HTML (Structure):
HTML provides the structural foundation of a web page. It is used to define the elements and layout of the content on the page.
In the context of a login form, HTML is used to create the structure of the form, including input fields for the username and password, buttons for submission, and any other relevant elements.
HTML elements such as <form>, <input>, <label>, and <button> are commonly used to design and structure the login form.
CSS (Style):
CSS is responsible for styling and presentation. It allows developers to control the visual aspects of the web page, making it aesthetically pleasing and user-friendly.
In the case of a login form, CSS is used to define the appearance, layout, and styling of the form elements. This includes setting colors, fonts, sizes, positioning, and overall visual design.
CSS can be used to create a responsive design, ensuring that the login form looks good and functions well on various screen sizes and devices.
By combining HTML and CSS, developers can create a well-structured and visually appealing login form that enhances the user experience. Additionally, HTML is used to define the form's structure, while CSS is employed to control its appearance, resulting in a separation of concerns that makes the code more modular and maintainable. This separation also allows for easier updates and modifications to the visual design without altering the underlying structure.
Now let's find below code example
Create file index.html
<!DOCTYPE html>
<html lang="en">
<head>
    <meta charset="UTF-8">
    <meta name="viewport" content="width=device-width, initial-scale=1.0">
    <title>Document</title>
    <link rel="stylesheet" href="style.css">
</head>
<body>
    <div class="box">
        <form action="">
            <h1>Sign In</h1>
            <div class="wrap-input">
                <input type="text" name="" id="" required>
                <span>Username</span>
                <i></i>
            </div>
            <div class="wrap-input">
                <input type="password" name="" id="" required>
                <span>Password</span>
                <i></i>
            </div>
            <div class="links">
                <a href="javascript:void(0)">Forgot Password?</a>
            </div>
            <input type="submit" value="Login">
        </form>
    </div>
</body>
</html>
Create file style.css
@import url('https://fonts.googleapis.com/css2?family=Lemon&display=swap');
*{
    margin: 0px;
    padding: 0;
    box-sizing: border-box;
    font-family: 'Lemon';
}
body
{
    display: flex;
    justify-content: center;
    align-items: center;
    min-height: 100vh;
    background-image: url('https://img.freepik.com/free-vector/silhouette-pine-tree-landscape-against-moonlit-sky_1048-8247.jpg?w=996&t=st=1705294691~exp=1705295291~hmac=b457b829623377bee321b504b96d2459b044e83ef0fc6a6ecd73db2ec69b8345');
    background-size: cover;
}
.box
{
    position: relative;
    width: 380px;
    height: 380px;
    background-color: #00ff40;
    border-radius: 15px;
}
form
{
    position: absolute;
    inset: 1px;
    background: #374053;
    padding: 30px 35px;
    border-radius: 15px;
    display: flex;
    flex-direction: column;
    box-shadow: rgba(132,255,0,0.5) 0px 4px 16px;
}
h1
{
    color: #00ff40;
    text-align: center;
}
.wrap-input
{
    position: relative;
    width: 305px;
    margin-top: 30px;
}
.wrap-input input
{
    position: relative;
    width: 100%;
    padding: 20px 10px 10px;
    background-color: transparent;
    outline: none;
    box-shadow: none;
    border: none;
    color: #23242a;
    font-size: 1em;
    letter-spacing: 0.05em;
    transition: 0.05s;
    z-index: 1;
}
.wrap-input span
{
    position: absolute;
    left: 0;
    padding: 20px 0px 10px;
    pointer-events: none;
    font-size: 1em;
    color: #8f8f8f;
    letter-spacing: 0.05em;
    transition: 0.5s;
}
.wrap-input input:valid ~ span,
.wrap-input input:focus ~ span
{
    color: #00fa3f;
    transform: translateX(0px) translateY(-34px);
    font-size: 1em;
}
.wrap-input i
{
    position: absolute;
    left: 0;
    bottom: 0;
    width: 100%;
    height: 2px;
    background-color: #00ff40;
    border-radius: 4px;
    overflow: hidden;
    transition: 0.5s;
    pointer-events: none;
    box-shadow: rgba(132,255,0,0.5) 0px 4px 16px;
}
.wrap-input input:valid ~ i,
.wrap-input input:focus ~ i
{
    height: 44px;
}
.links
{
    display: flex;
    justify-content: space-between;
}
.links a
{
    margin: 10px 0;
    font-size: 0.75em;
    color: #8f8f8f;
    text-decoration: beige;
}
.links a:hover,
.links a:nth-child(2)
{
    color: #00ff40;
}
input[type='submit']
{
    border: none;
    outline: none;
    padding: 11px 25px;
    background-color: #00ff40;
    cursor: pointer;
    border-radius: 4px;
    font-weight: 600;
    margin-top: 10px;
    color: #006d1b;
}
input[type='submit']:active
{
    opacity: 0.5;
}
Hope it would help you!
CSS
Author
As the founder and passionate educator behind this platform, I’m dedicated to sharing practical knowledge in programming to help you grow. Whether you’re a beginner exploring Machine Learning, PHP, Laravel, Python, Java, or Android Development, you’ll find tutorials here that are simple, accessible, and easy to understand. My mission is to make learning enjoyable and effective for everyone. Dive in, start learning, and don’t forget to follow along for more tips and insights!. Follow him